Build-your-own-salad-platter

What to dish up on a lazy summers’ afternoon? Why, a build-your-own-salad-platter, of course!

Don’t get me wrong, I love cooking and it fills me with pleasure to whip up delicious things, but sometimes {especially on a lazy Sunday, when you’ve already spent the day sweeping and picking up toys} you just want to be able to snap your fingers and make something appear!

Ah, well, that’s not going to happen soon, so instead, it’s handy to just throw together a platter and let everyone help themselves.

Here’s my seafood salad platter – using items I already had on hand:

Simple salad {lettuce, cucumber cubes & tomato, dressed with olive oil}

Tinned smoked mussels

Smoked snoek {remember to remove the bones!}

Blanched green beans, drizzled with olive oil and capers

Fresh tomatoes {on the vine}

Boiled eggs, seasoned with salt {I boil the eggs for exactly 7 minutes to get a nice soft-boiled egg}

Lemon mayonnaise dressing {just add a squeeze of fresh lemon juice to mayonnaise}

Everyone can help themselves to what they want and build their own salad – enjoy with cold white wine or a crisp Savannah!

x

Build-your-own-salad-platter

Veggie Fridge Raid!

I must confess to shopping blindly last week… I usually plan my week’s menu ahead and then shop accordingly – so I don’t waste anything and I don’t have to spend hours trying to figure out what to cook for dinner.

Yesterday, as I was cleaning out the fridge, I realised I had heaps of veggies that I need to use before my weekly shop. Also, I had some uncooked patties that I had to use.

So – here it is, my ratatouille stacks (using pattipans instead of zucchini):

Layer spinach & mushrooms, hamburger patties (or a steak!), ratatouille and top with roasted tomatoes on the vine.

Spinach & mushrooms:

10 large spinach leaves

5 mushrooms

2 tbs butter

2 tbs cream

white pepper

Heat butter in a pan and sauté mushrooms. Add spinach, wilt it down slightly (don’t let it get soggy, you still want some crunch to it) and then add cream and pepper. Set aside.

Ratatouille:

1/2 an onion

6 pattipans, diced

1 large aubergine, diced

2 large red tomatoes, diced

Olive oil

Salt

Peppadew spice

Start off by sautéing the onions in olive oil, add aubergine. Next, once those two have softened a bit, add pattipans and more olive oil. Add tomatoes, season with salt and peppadew spice, add another glug of olive oil, reduce heat and just let it simmer away until you’re happy that all the flavours have mingled nicely and everything is cooked.

Roasted vine tomatoes:

Place a vine of tomatoes in an oven roasting dish, sprinkle with olive oil & ground sea salt and bake at 180C for 15 minutes. After 15 minutes, grill for 5 minutes in the oven.

Once everything is ready – remember to grill those patties! – assemble and enjoy!

X

Ratatouille stacks image

Meatilicious bake

I love different meats together – it just seems to add to the taste and make it more exciting! {not always – and not with all meats… Still – just try it out sometime, there are lots of options here!)

For tonight’s bake I layered strips of bacon, tenderised and flattened chicken breast, pork roast meat, mozzarella cheese and more bacon.

I seasoned the chicken breast with freshly ground sea salt and olive oil then layered on the pork roast meat. {This I had leftover from a roast I made a week ago – and froze the leftovers – it also had an apple & sage stuffing.} I added freshly ground fennel seeds,another layer of chicken breast, then thick slices of mozzarella cheese and more bacon.

{You could use any cooked pork meat, a leftover roast or even some pork chops…}

Bake at 180C for 45 minutes – this is just enough time to ensure the chicken is cooked properly but is still juicy.

I served this with a sundried tomato & goats cheese salad. {Mixed lettuce leaves, diced cucumber, sundried tomatoes, goats cheese and a drizzle of olive oil.}

I prefer salads with less but more ‘punchy’ ingredients – like they say, less is more!  And forget elaborate salad dressings – you want to taste the salad, right?! My current favourite dressings are vinegars and olive oil – perhaps with a splash of fresh minneola juice {now in season} and honey to bring out the flavours of the salad. And nuts – yum, I love nuts in salad! Raisins are great too!

Ok, before I get too carried away – here’s a pic of my meatilicious bake and my youngest, ‘helping’ me in the kitchen today…

Enjoy! X

image

Grilled Aubergine Burgers

I don’t know about you, but I love aubergines (eggplant / brinjals)!

I’ve realised that a lot of people don’t know what to do with them, or haven’t even tried them before. They’re usually a hit with vegetarians because of their fleshy texture and is often used as a meat-substitute – but not in our house – no way! We love meat! So what better way to have aubergine, than with meat, on a burger!

This is a good paleo-friendly burger version – using grilled aubergine slices as the ‘bun’. You can put anything you feel like on your burger, but here’s what I did:

Grilled aubergine slices (brush with olive oil and grill on a griddle pan or straight on the braai / barbecue)

Sliced fresh tomatoes

Lettuce leaves

Fairview Blue en Blanc cheese (a creamy camembert-type cheese with blue vein running through – simply scrummy!)

Caramelised onion (onions sautéed in butter with a drizzle of honey and a splash of balsamic vinegar – sauté until nice and caramelised)

Burger patties (I used blouwildebeest – will also work nicely with ostrich or beef)

And last but DEFINITELY not least – grilled bacon strips

Assemble everything inbetween aubergine slices, secure with toothpicks and enjoy!

Aubergine burgers

The ‘Golden’ Egg

After weeks (months) of patiently waiting for our chickens to lay their eggs, we were pleasantly surprised yesterday with two little eggs inside the coop!

Yay! It felt as if I had ‘laid’ them myself, I was so proud! I just don’t know which chicken it came from… We have 5 original hens, but they’re actually still 2 weeks away from laying, and then we have another hen, she’s a bit older, who probably laid these eggs.  Anyways, I suppose it doesn’t really matter who did it!

The eggs are a bit smaller than I would have expected, but apparently they get bigger – hooray!  I fried the eggs for breakfast this morning and oh my, what yummy eggs they were!! A golden yolk, so vibrantly golden, and perfectly fresh whites, not too runny. Even though they were smaller than regular shop-bought ‘free range’ (yeah right!) eggs, they tasted a hundred times better!

I made shop-bought eggs as well, and hubby and I each got one of each type of egg so we could compare. The difference is quite remarkable. I SO cannot wait for more eggs – imagine how yummy custard would be – or an omelette or anything using eggs!

Here’s to dozens and dozens of yummy, hearty, golden eggs! X

Our first eggs!

Warthog Pie


Warthog Pie

Leftovers… What leftovers?! I used most of the leftover meat from a warthog roast we made a few days ago. (I froze the meat)

I hate wasting food and and there is usually something creative and tasty you can do with leftovers – especially meat. Just be sure to freeze it if you’re not going to use it straight away.

Anyway, so here’s my recipe for a delicious, juicy warthog pie: (You could use regular pork meat too!)

Leftover warthog meat (in a sherry, ginger & quince glaze – see my post Warthog Roast), +-800g, cut into small pieces

1 carrot, diced

250g peas

500g streaky, fatty bacon (warthog meat is very lean and loves a bit of fattiness!)

1 onion, chopped

1 cup of dry white wine (I used Pinot Grigio)

1 1/2 cups of chicken stock

Sauté onion in olive oil and add carrots. Add diced bacon, warthog meat and peas – cook until bacon is cooked. Add wine and stock and let it simmer for a good 1/2 hour at least.

Let the mixture cool, then add 3 tbs of flour to thicken it up while baking. Put filling into a pie dish and cover with puff pastry. Brush with egg and bake at 180C for 40 minutes until golden brown.

Enjoy with a yummy salad – we had roast beet, goats cheese & walnuts on a bed of mixed lettuce and drizzled with olive oil.

x

#dinner tonight: Zucchini Lasagna

After having way too much {delicious, delicious, yet makes-you-feel-icky} bread yesterday {remember I don’t do much carbs these days and no bread really, so I’m not used to it anymore!}, I decided on a yummy zucchini lasagna bake.

Instead of using lasagna pasta, I used thinly sliced zucchini.

This is a classic dish,with 3 main components:

Bolognese mince sauce, bechamel or white sauce and lasagna (zucchini!)

For the bolognese sauce:

1/2 an onion

500g venison mince

peppadew spice

2 tsp tomato purée

1 can of Italian cherry tomatoes or chopped tomatoes

1 carrot, finely grated

1 clove of garlic, chopped

About half a cup of red wine (I used Porcupine Ridge Cabernet Sauvignon)

2 tbs brown sugar

salt

Sauté onions and garlic in olive oil until soft, then add mince and peppadew spice and cook through. Add tomato purée and carrot. Add can of tomatoes and sugar. Add wine and let it simmer and reduce slightly until all the flavours have mingled nicely. Season with salt.

For the bechamel sauce:

2 tbs butter

2 tbs plain flour

1 cup of warm milk

salt & white pepper

Heat butter in a saucepan and when it’s melted, whisk in the flour to form a paste. Slowly add warm milk in teensy bits and whisk furiously to ensure the paste stays smooth and silky while the milk is added. Once all the milk is added, you should have a thin-ish and smooth consistency. Continue to whisk over medium heat, allowing the sauce to thicken. Season with a pinch of salt & white pepper.

Layer in an oven dish: start with zucchini ribbons (I used about 5 that I sliced into 2mm strips), then a layer of bolognese, followed by white sauce. Sprinkle with grated cheddar cheese. Add another layer of zucchini and top with the rest of the mince. Sprinkle with more cheese.

Bake at 180C for 30 minutes.

Serve with mixed herb salad and avocado, a sprinkle of freshly ground salt and a drizzle of olive oil – enjoy! X

image image

#BraaiDay – Roast Pork Neck with Apple & Sage stuffing

Our Braai Day feast consisted of:

Corn bread & chicken liver paté for starters

Roast (and lightly smoked) pork neck stuffed with Apple & Sage

Roast beet & goats cheese salad

Buttery roasted sweet potato

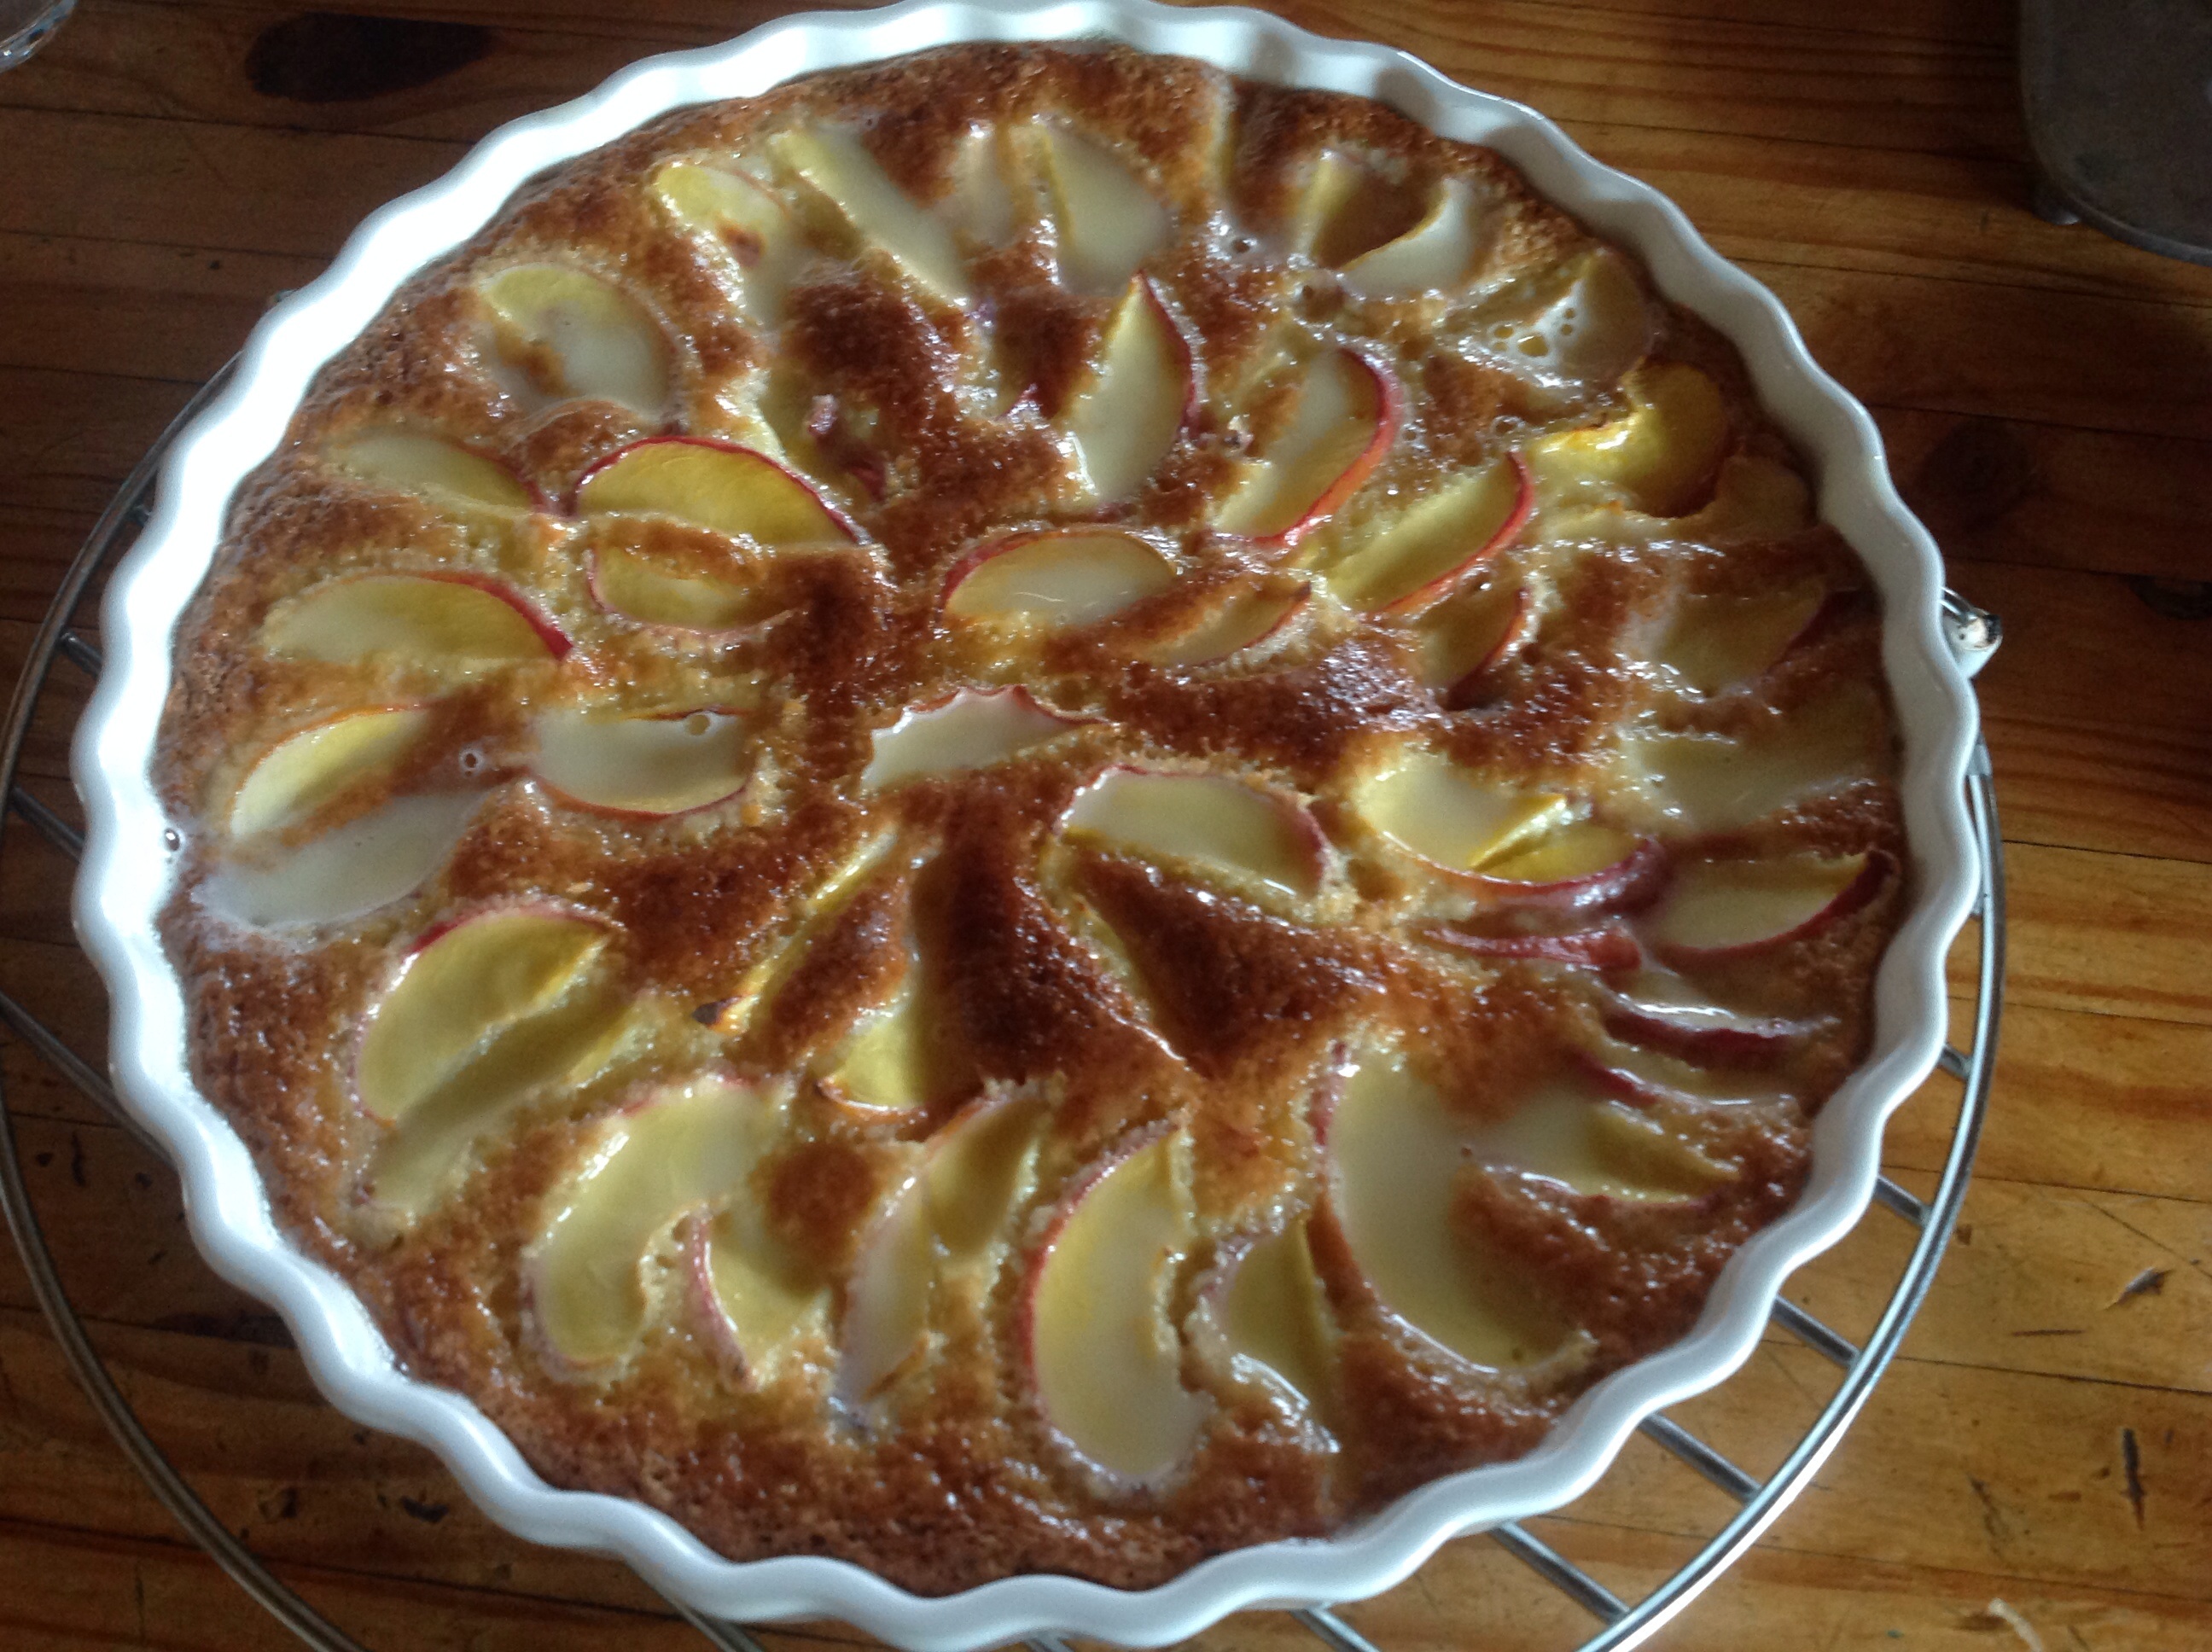
Peach tart for dessert

Roast Pork:

2kg deboned pork neck

Woolworths BBQ rub (a brown sugar & coriander rub)

2 large granny smith apples, peeled, cored & cubed

butter

4 slices of thick white bread, crusts removed and cubed

8 fresh sage leaves

handful of dried apples

olive oil

brown sugar

1 onion, diced

1 egg, beaten

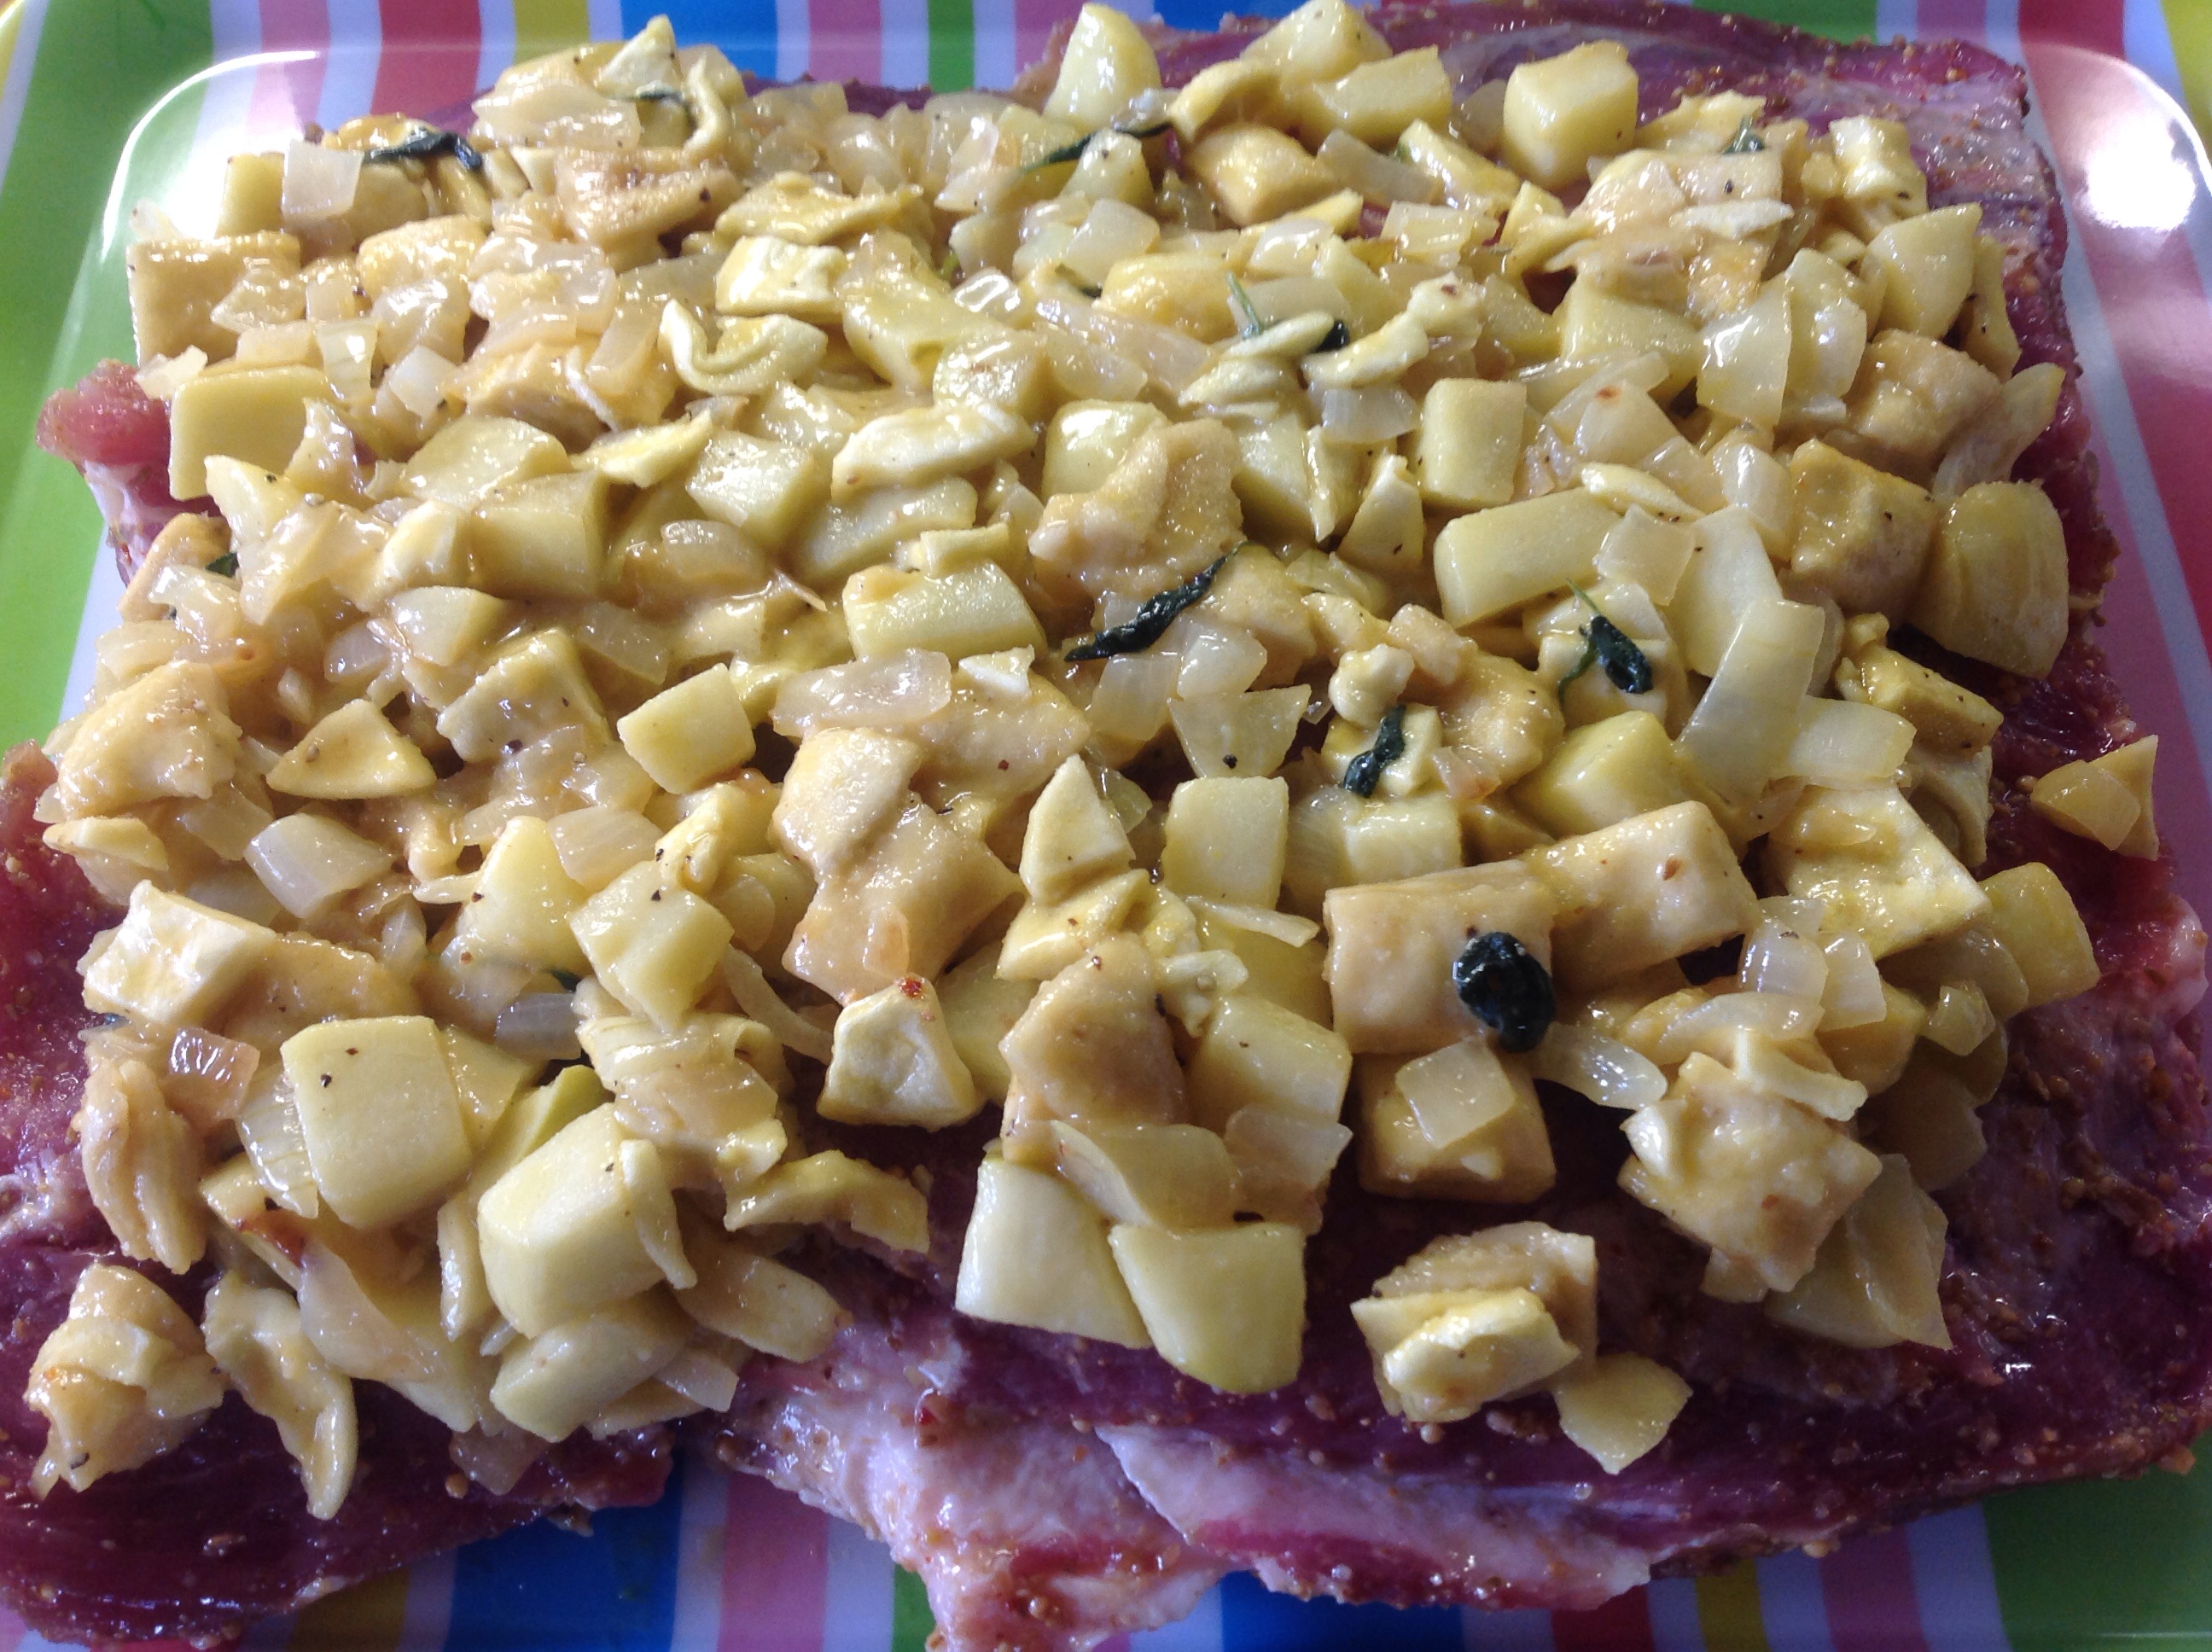
Slice pork neck open length-wise, but not all the way through – you should be able to fold open and have one large piece of pork.

Deboned pork neck

Rub with olive oil and BBQ rub – I used about half a pot – inside and outside. Fold the pork neck closed, place in a casserole, clingwrap and refrigerate overnight.

In a skillet or casserole, sauté onions, apples & sage until soft. Remove from heat and add bread, salt & pepper, egg and half a cup of brown sugar. Let this mixture cool before stuffing the pork.

Remove pork from fridge a while before stuffing, allowing it to get to room temperature.

Fold open the pork and spread stuffing mixture over the entire piece of pork.

Stuffing on pork

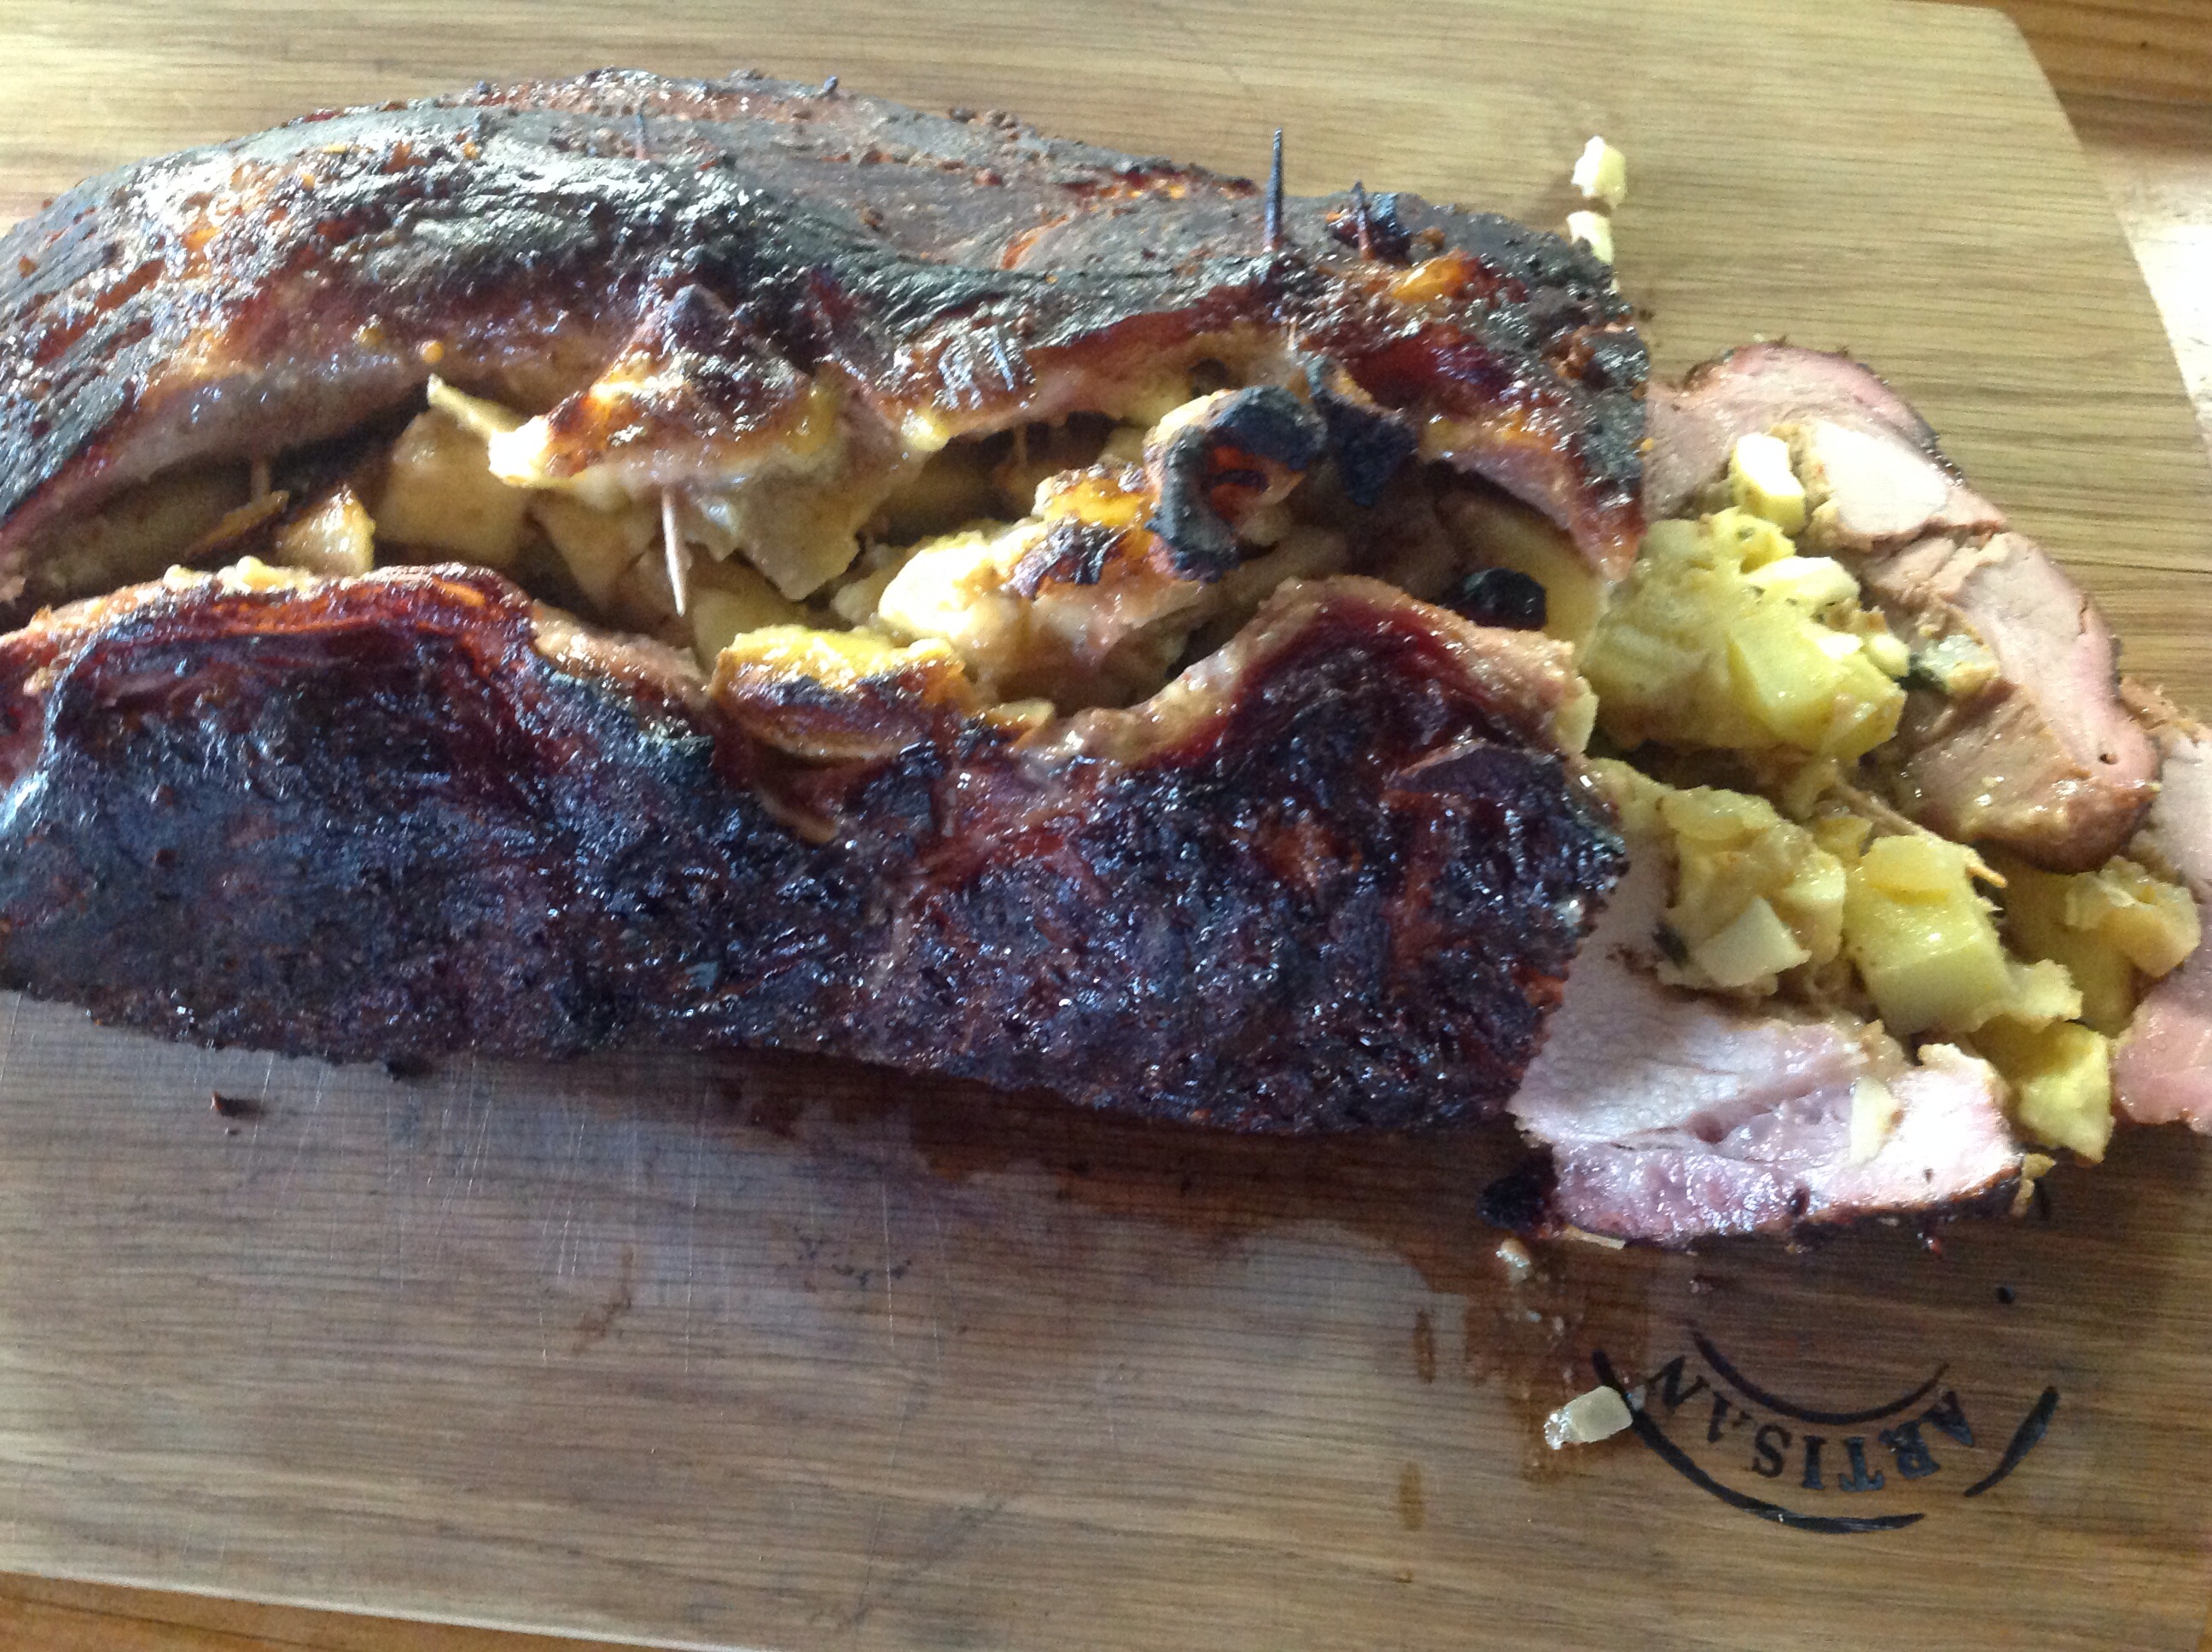
Roll up up gently, keeping all the stuffing inside. Fasten with string or secure with toothpicks.

Roast or smoke for 2 hours at 120C. (We smoked it low & slow, just to give it a hint of smokiness – but you can just roast it too.)

Roast pork

Roast beet & goats cheese salad:

Place beets into a casserole & rub with olive oil, balsamic & salt. Roast until tender (2hrs). Let them cool, peel and cut into quarters.

Toss cooled en roasted beets with mixed salad leaves, goats cheese chunks and ribboned cucumber. Sprinkle with chopped walnuts and serve with olive oil & balsamic vinegar.

image

Buttery sweet potatoes:

Cut sweet potatoes into quarters, place dollops of butter on top and inbetween, sprinkle with peppadew spice and roast for 2hrs with the pork (in a separate casserole).

Corn bread: (recipe from Sarie.com)

500g self-raising flour

3ml salt

50ml sugar

30ml sunflower oil

2 eggs – beaten

200ml evaporated milk

1 can of creamed corn

100g grated cheddar

1tbs chopped parsley

Mix flour, salt & sugar. Whisk together oil, eggs & milk and add to flour mixture. Add rest of ingredients and mix well.

Place in a greased black ‘braai’ pot and bake on the coals (also place hot coals on top of the lid) for an hour.
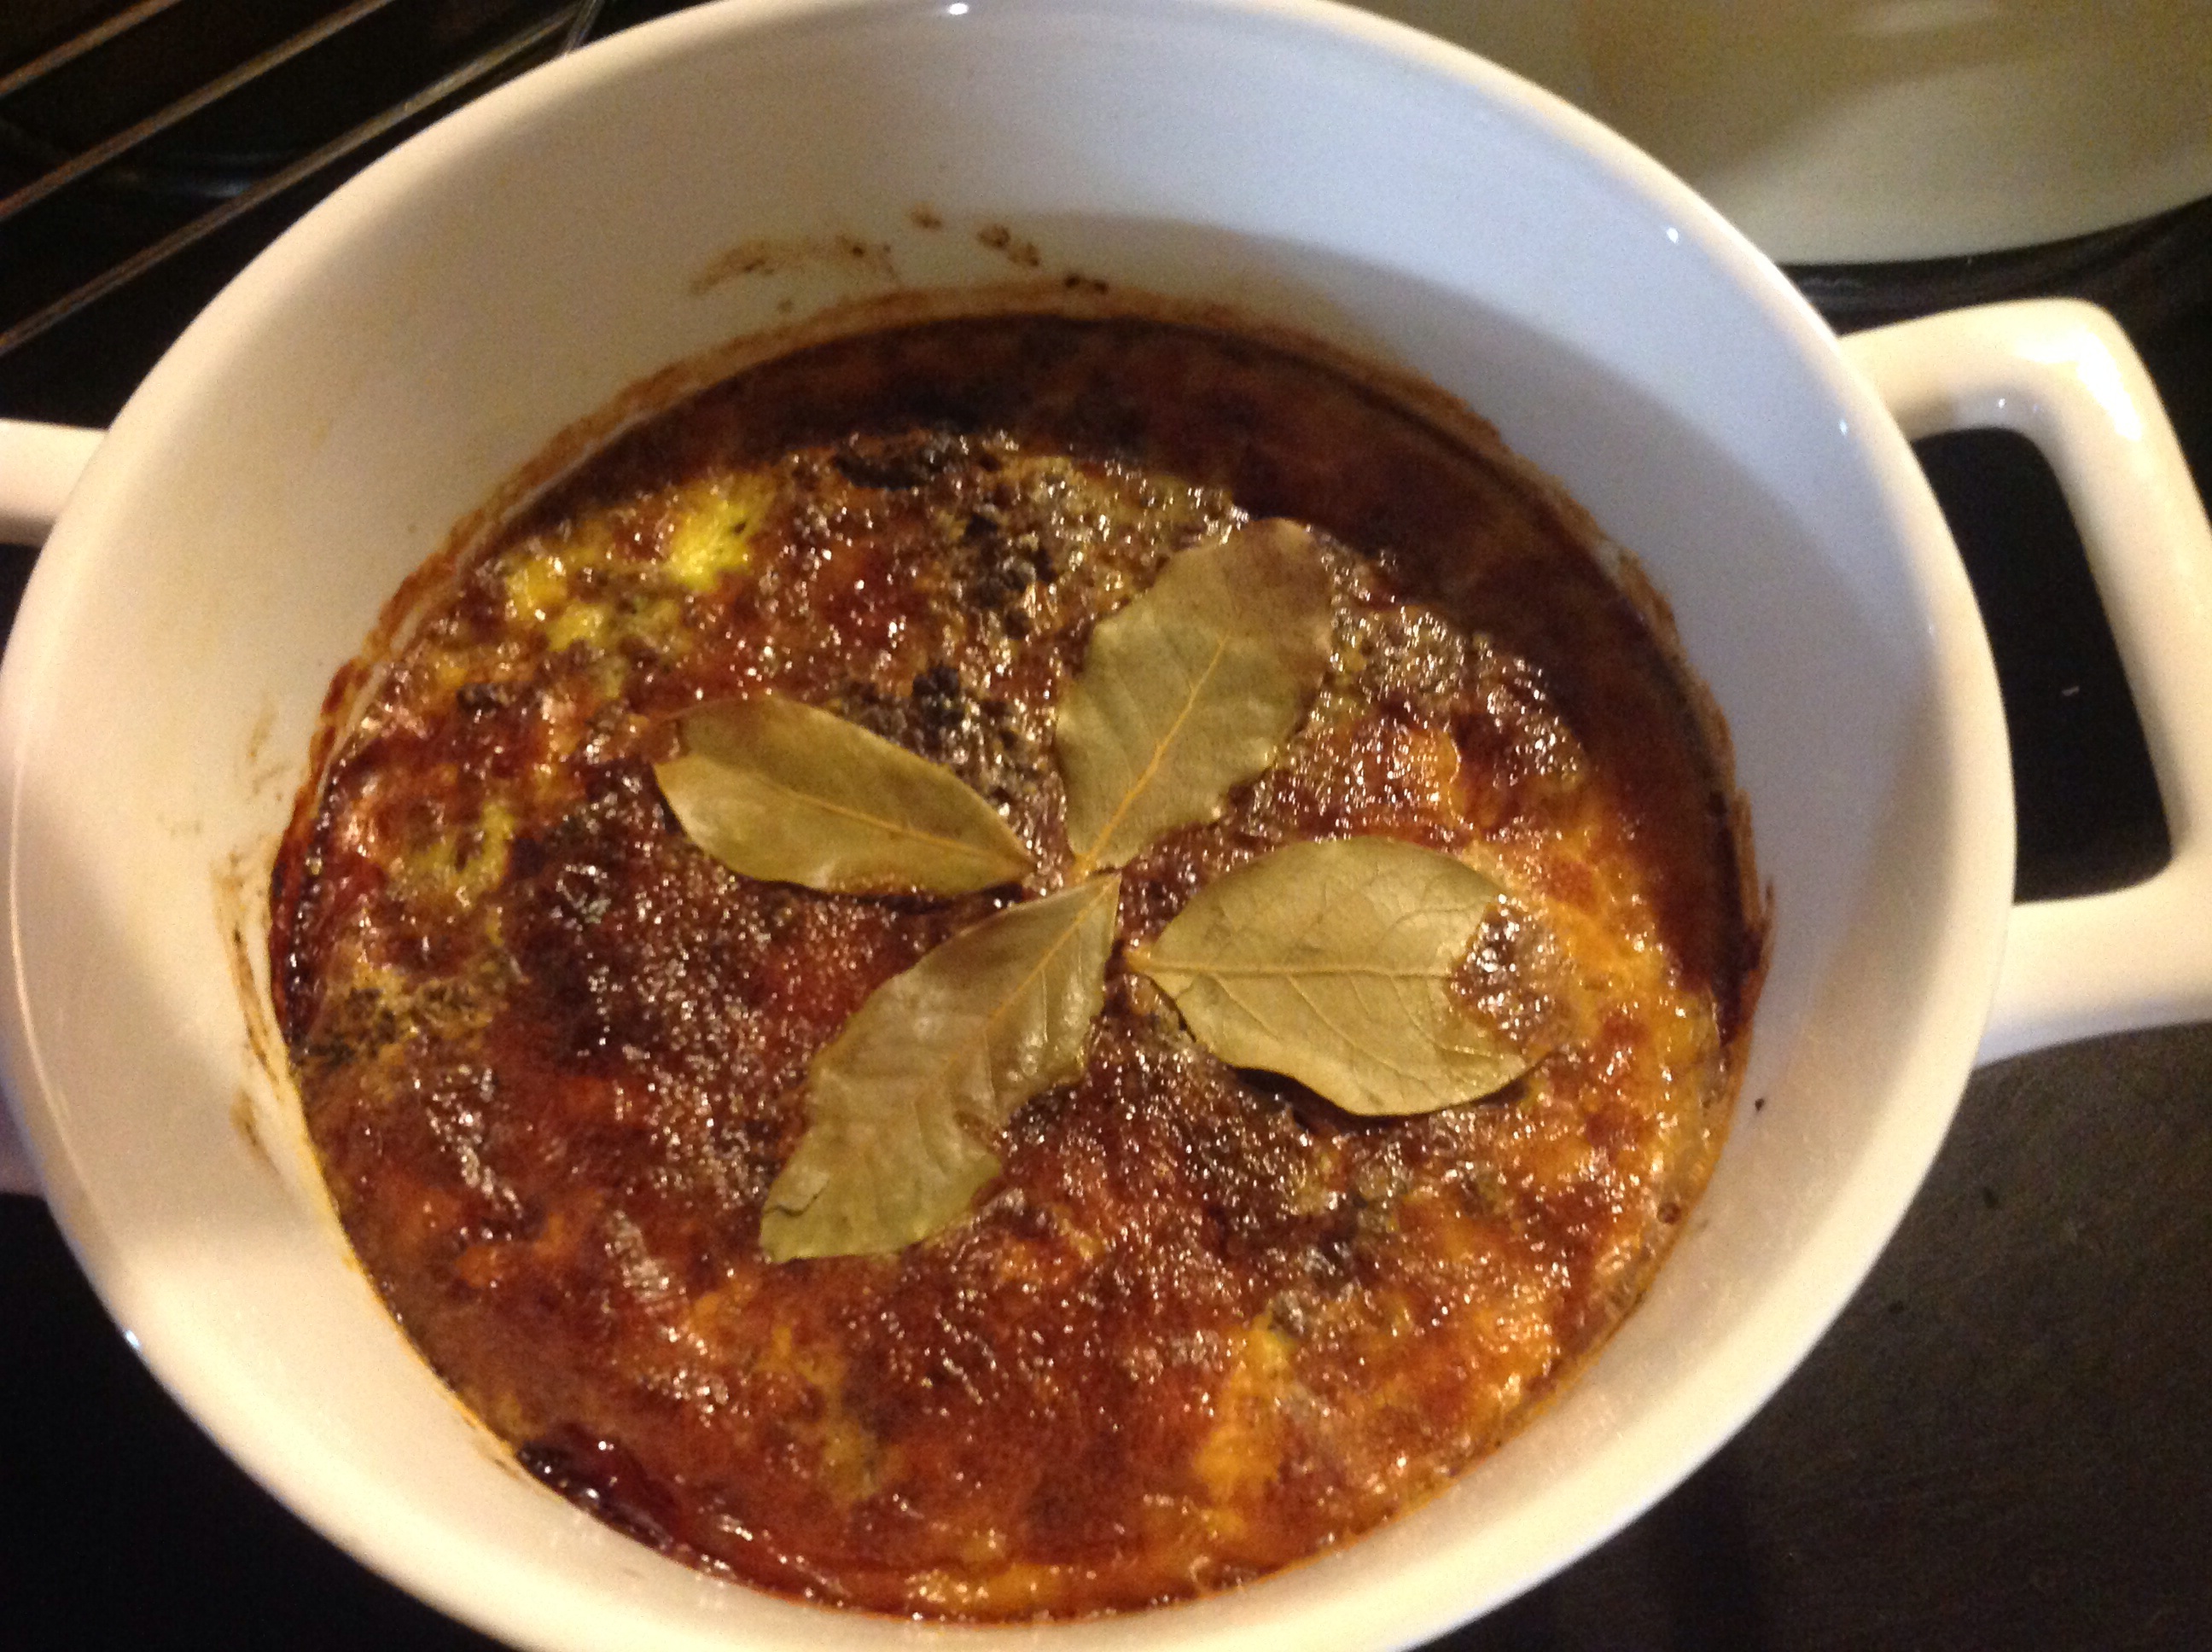
image

Chicken liver paté: 

1kg chicken livers, cleaned

1 onion

1 cup of brandy

salt & pepper

1/2 cup of cream

bay leaves

butter

Soak chicken livers in brandy for an hour (do not discard liquid). Sauté onions in butter until soft. Remove livers from brandy. Add to onions and fry until cooked and no longer pink. Season with salt & pepper. Add cream. Transfer to blender and blend to a smooth consistency. Add the brandy that you soaked the livers in. Add half a cup of butter (soft) and blend until properly mixed.

Pour into desired dishes and top with melted butter and a bay leaf – refrigerate overnight.

Serve with corn bread.

image

Peach tart:

1 cup of sugar

1/4 cup of butter

1/4 cup of milk

1 cup of flour

1 tsp baking powder

2 eggs

3 dessert peaches

Cream together sugar & butter. Add milk And mix. Add eggs and mix again. Sift together flour, baking powder & salt and add to egg mixture. Place in greased tart dish, top with thinly sliced peaches and bake at 180C for 40 minutes until golden brown and a toothpick comes out clean.

image

Enjoy! X

Bobotie – Always a Favourite!

After a nice weekend of relaxing and just taking it easy – visiting with some friends and drinking a bit too much wine – I decided on one of those good ol’ favourites: Bobotie.

I think this dish is perfect for a weekday dinner – you cook everything in one pot, add a bit of this and that – pop it in the oven and voila – dinner is done! You don’t even need to serve it with anything – just as is, is perfect. However, you can add a salad, or serve it with yellow rice (traditional way).

Tonight, we just had it as is, as I’ve had a lot to prepare for our #HeritageDay braai tomorrow. (You will have to wait for tomorrow’s post to see…)

Bobotie:

500g  venison mince

1 onion, chopped

1 tsp turmeric

2ml ground cloves

10ml masala powder

10ml mild curry powder

salt

1 egg

2 slices of stale white bread, soaked in water

10ml lemon juice

100ml raisins (soaked in water to make them extra juicy)

3 tbs apricot jam

3 tbs oil

Sauté onion in the oil and add spices. Sauté until the onion is soft and spices cooked out. Add mince and cook for a few minutes until the mince is almost cooked. (If you overcook the mince, it tends to make the dish very dry.)

Add lemon juice, apricot jam and raisins – cook a little bit more and mix through.  Remove from heat and add egg, as well as the bread, making sure you squeeze the excess water from the bread.

Mix through properly and scoop into a buttered oven dish.

Cover with savoury custard and place 4 bay leaves on top.

To make the savoury custard, beat 2 eggs together with half a cup of mil and a pinch of salt.

Bake at 160C for 45 minutes, until golden brown on top.

Enjoy! X

Bobotie

Our Veggie Garden!

I’m so excited about our veggie garden! We’ve started to plant a few seeds – mielies (corn), carrots, beets and spinach, as well as some herbs – sage, coriander, basil, dill and watercress.

Our thieving chickens are pecking up all the seedlings – grrr – but some of them are still hanging in there. Hubby is fencing off our veggie patch tomorrow and hopefully the chickens will stay out!

Anyways, as this is our first attempt at becoming more self sustainable, we will see how it goes and then go from there. (I love plants and growing herbs, but to be honest, nothing survives for very long at my hands… {blush})

I found a really great blog about growing your own vegetables:  www.its-our-life-for-six.blogspot.com

So inspiring – I hope our veggies will turn out as beautiful as theirs!

Here’s a peek into our garden (remember nothing has sprouted yet!):

image image image

The compost heap was made from old pallets (yes – another one for Pinterest!) and we filled them with horse manure, as well as all the fruit & veg off cuts from the kitchen. Holes were made into the heap by placing thick wooden poles down the middle and then removing them – for ventilation.

The veggie patch fencing is made from off cuts of wood we had lying around – well, it came from an old shed that was taken down. Hubby sawed all the pieces to size and then timbered them all together to form these fab picket fences. We saved about R5000 by making them ourselves – whoop whoop!

image image imageimage

My wish for our little seedlings: grow baby grow!

X